slush pulp: bespoke drawing paper
We’ve been making pastel drawings for a while now. We wondered how we could bring the drawing and the sculpture together. Making our own drawing paper seemed a start.
there’s tooth and then there’s texture
The paper we use is lightly beaten cotton rag. We couched several sheets onto the vacuum table. We distressed and rearranged them to give them an all over texture with irregular contours and negative spaces. We drew with pastel and charcoal on the still wet, lightly vacuumed sheet.
shaped and embossed drawing paper, thick and textured
We’ve been making pastel drawings on store-bought for a while now. We wondered how we could bring the drawing and the sculpture together. Making our own drawing paper seemed a start.
To get some openings and cool contours, we broke up the sheets by couching askew on scraps of pellon. Then we crudely perforated them with finger tapping. Finally, we’d couch what was on the pellon elsewhere on the construction site.
a sheet, freshly couched and manipulated before vacuuming.
pastels on wet paper: you’ll never go back
After about 1 minute of vacuum table, we began to draw on the still sodden paper with soft pastels which glide on creamily. The black has a particularly crisp woodcut look as the stick lightly pulls across the textures we’ve impressed into the paper.
Our “sheet” is about 42” x 54” and constructed from three 18” x 24” and two 8.5” x 11” deckle boxed sheets of cotton rag.
We further distressed the surface by impressing some things during vacuuming. The drawing took several days to dry.
To see another drawing made the same way, go to paper objects.
LandesSullivan at gmail.com
Pastels on wet paper dry with rich variety - in places looking part of the paper or a wash of color and elsewhere the pastel sits on the surface as if block printed. The pastels need less fixative when applied this way.
Blowouts - water spray on freshly pulled handmade paper
We deckle boxed a sheet of mixed black and white cotton pulp.
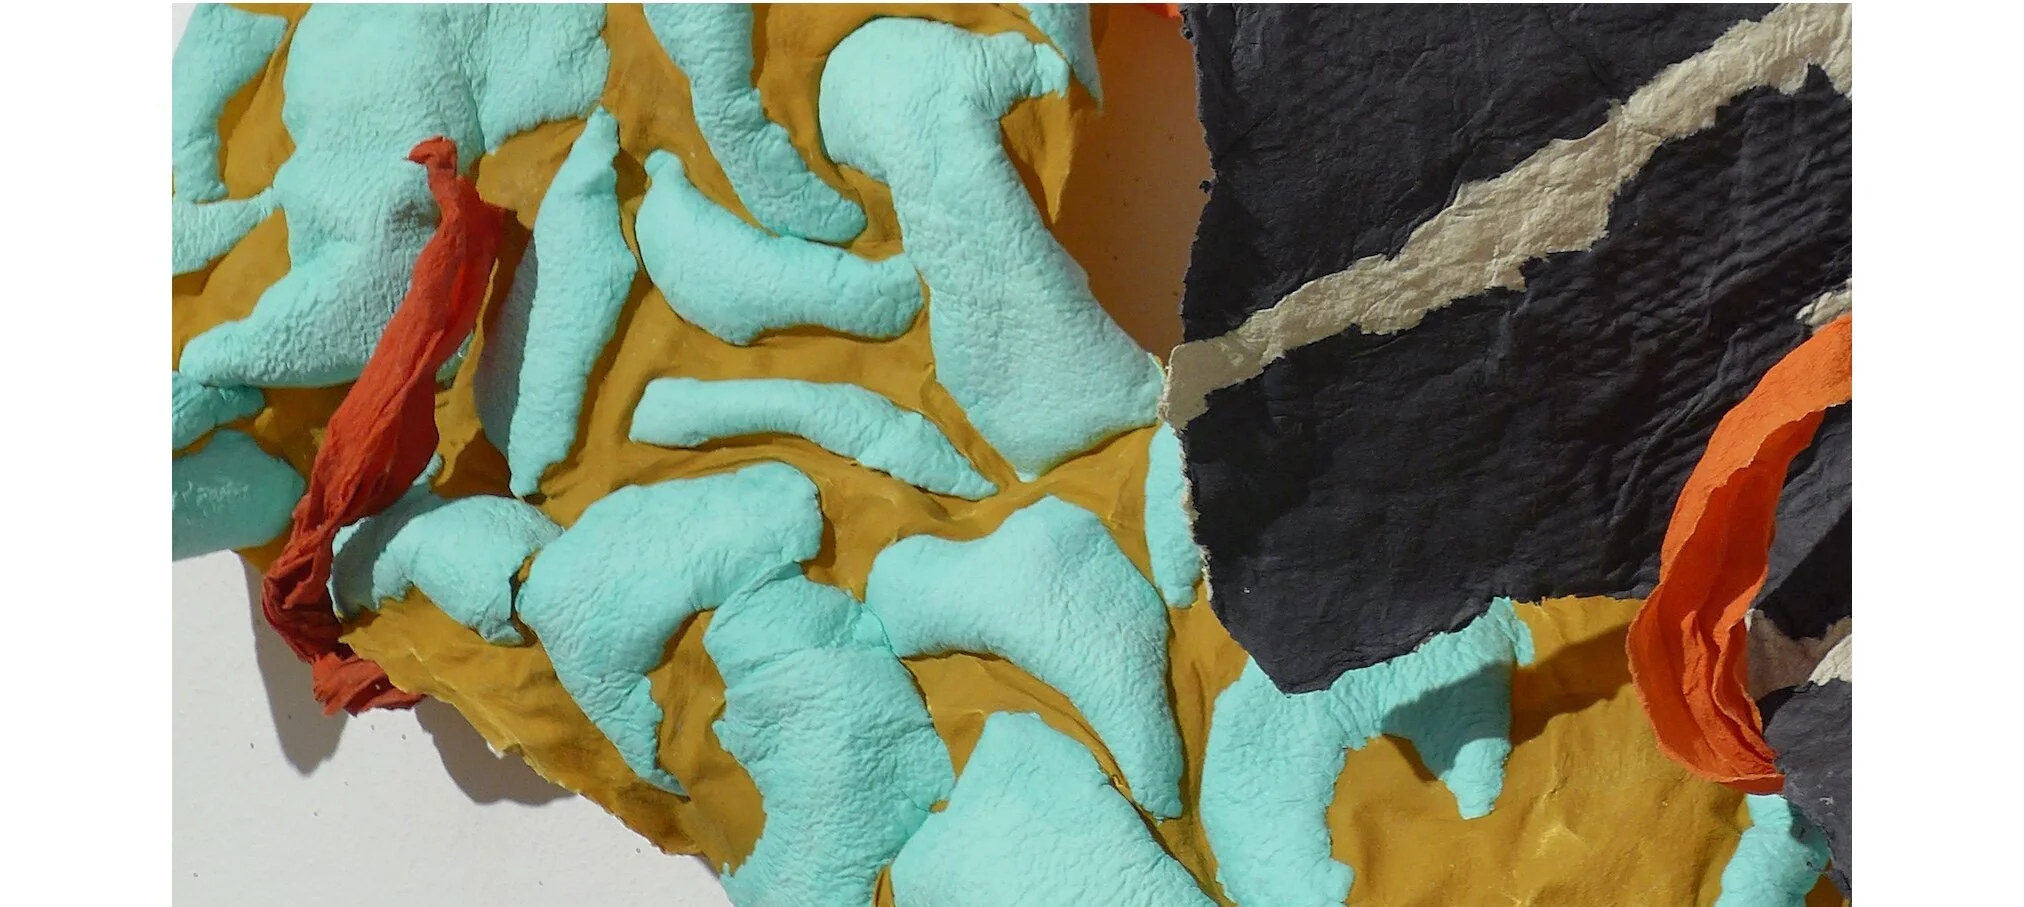
 After removing the deckle, we lay some weighty, interesting shapes on the sheet (in this case some steel clamps.) Then we remove all the pulp still showing by blowing it out with the spray from a water hose. The weight of the objects keeps the water pressure from displacing them and disturbing the pulp beneath.
black and white cotton linter blowout couched onto a peach backing sheet
Blowouts of clamps, fresh and wet, dry and used.
We deckle box a sheet of mixed black and white cotton pulp. After removing the deckle, we lay some weighty, interesting shapes on the sheet (in this case some steel clamps.) Then we remove all the pulp still showing by blowing it out with the spray from a water hose. The weight of the objects keeps the water pressure from displacing them and disturbing the pulp beneath.
Pulled a sheet of cotton paper and laid clamps on the sheet while still on the mould to protect the fiber in those places for the blow-out
We used our fingers and a water spray to blow away the paper around the clamps. When we lifted off the clamps, we had our clamp shaped silhouettes of fiber.
blowout couched on backing sheet
After the clamps are removed, what is left is then couched onto an orange base sheet. Both the black and white sheet and the orange are from cotton rag and linters and were formed with a 12" x 18" deckle box. We did several of these sheets, one of which was torn into strips and collaged into one of the works shown below. Most of another sheet was wrapped around the abaca coils that bend a scrap of luan as seen in the other work.
We learned this technique at an open studio session at Dieu Donné paper mill.
A couple more examples -
after blowing the visible pulp away from a thrift store placemat
peeling back the place mat mask
ready to be couched on to a base sheet
a light uneven touch brings off an artistic amount of pulp onto the base sheet.
The first blowout and a 2nd one a few minutes later
sketched a tangle on a sheet of rubber, cut it out. the scattered pulp like that at left is often quite dramatic and often becomes part of what get couched onto the backing sheet
getting masks off the wet sheet can be tricky that can require a lot of pressing, peeling and lifting
ready for couching on to a base sheet
We used a scrap of one of the blowout sheets at the top to encircle the network of coils on this bent wood piece. This work is from table top works
There’s something tiger stripe-like about this blowout. We think that gave us the idea to cut one of the sheets in strips of stripes. This tapestry was in a juried show organized by a friend in Green Lake WI. She walked by it for a month in the gallery and decided she needed to keep walking by it every day. more like this in paper objects
LandesSullivan at gmail.com
making puffers
Putting a patch of low shrinkage cotton fiber onto a high shrinkage ground like abaca produces a wonderful puffing effect. The post follows the creation of the puffer shown above.
Detail of a work incorporating a “puffer,” see recent work
Lightly beaten cotton on overbeaten abaca will puff up when dry.
Here, the ochre ground is abaca beaten 6 hours. It shrinks a good bit (maybe 30%) by itself. The veronese green shapes are 60 - 75 minute cotton linters which produces a low or no shrinkage fiber. When a low shrinkage patch of cotton is stuck on a sheet of high shrinkage abaca, the tension during drying makes the cotton area puff out to accommodate the greater shrinkage of abaca.
step by step process to make a “puffer”
The purposely irregular shape in Photo 1 is made up of still wet, but pressed ochre abaca sheets. The next photo is a thick sheet of freshly pulled cotton broken into shapes while still on the mold. These shapes are then couched individually - and carefully - onto a scrap of pellon or even onto a large hand. Then they are transferred onto the ochre ground.
In Photo 3, Barbara is “couching” a cotton shape from pellon to background abaca. Once we had the shapes in place, we blotted them again with a large piece of pellon. We liked the light coming through the wet parts of the pellon as we peeled it away so we include it here even though it also shows our dye still running a little bit.
As shown by the sheen in photo 6, we slathered on the methyl cellulose, a reversible glue, that will help strengthen the bonding of the abaca and cotton. (The cotton could pop off the abaca as it dries because of the shrinkage differential.) We left it uncovered overnight. It finished drying quite quickly the next day in the hot summer sun.
We tend to think of the front of the sheet as the two color side, but it is beautiful on both sides. Either side may face out in any particular composition.
LandesSullivan at gmail.com
The "puffer" is the central focus in this work called Stay, I'm coming all this way to show you something
Talking on the phone with Joan 92
Playing up nothing: Making holes out of papers
We like negative space, so we cast some. We laid down some odd shaped plywood pieces and filled in the space around them with wet sheets of lightly pressed cotton paper. The pebbles were pressed in for texture.
We call this series of objects “holed’ers” because the pieces were initially, at least, holed by positive shapes.
We cast with blue jean cotton rag paper filling the spaces between the islands of plywood. The garden store pebbles added ripples of texture.
Holes in your soul help you breathe out 2018 handmade cast rage cotton and pigmented abaca papers, 30” x 38” x 11”
enclosing negative spaces - Holed’ers
We like negative space, so we cast some. We laid down some odd shaped plywood pieces and filled in the space around them with wet sheets of lightly pressed cotton paper. The pebbles were pressed in for texture.
We like the thick flange-like, shadow-catching edges that run around the shapes. The resulting form invites entanglement.
We call them “holed’ers” because the pieces were initially, at least, holed by positive shapes.
The second holed’er has more color.
We started laying down paper shapes to build up the form and let that process suggest where the holes would go. Unfortunately, the plywood shapes worked much better than these bland angular gaps. After covering up this side in black, we used some pastel to sketch out some hole modifications. Though we promptly covered up the pastel, we liked it and we use it again in our third holed’er try.
We laid out a patchwork of paper shapes and negative spaces before manipulating them, adding and subtracting as necessary.
The final piece has a nice exchange between the easy, verdant shapes on this side and the smoky blue and black of the reverse.
We increased the sizes of the holes by simply cutting and folding the paper back on itself rather than cutting it away. The benefit is that it gave us some color on the black side We also added some paper marbled with blue and black pulp. We dried the piece over large plywood shapes to complement the negative space contours as well as to give the piece some dimension and throw a little shadow.
That light veronese green pastel on the wet black rag paper was a simple guide as to where to tear and fold back. We’ve been using pastel on wet paper ever since because it is so dreamy, creamy and damn near unseemly.
We planned to trim away the folded back bits, but we decided they should stay put. The plywood mold with its similar contours and simple stepped relief was enough to give the piece some depth and gesture.
The next holed’er began with drawings generated by swopping a pencil or pastel back and forth.
We chose the colors and worked with them for a while before one of us said, “Those are Dunkin’ Donuts colors, aren’t they?” They are, but we were hooked on them by then.
studio shot of sketches for new holed’ers.
1st layer of new holed’er is constructed from pigmented cotton linters/abaca mix. We wanted to exaggerate the negative spaces so they’d compete with the colors for focus.
To chill the DD vibe a little, we again made one side a single color. This time white. We added some pastel to juice it a bit.
We tried water color, but painting on wet lightly pressed paper requires lightning brushwork. We found it easier to paint on scraps of wet paper and monoprint them onto the piece.
Pastel and monoprinting was used on the flip side to jazz up the bleak whiteness.
Taking advantage of the large netlike construction, we could flip parts front to back to push some dimensionality even before we used it in compositions.
The finished holed’er offers a lot of connections points for interlocking with other elements in composing our sculptures.
We were happy with the piece at this point. It looked OK as flatwork, but we were hoping it would be more dimensional and floppy. It also had to drape well with others. We chased away the flatness by folding over and twisting parts and then fitting them back together in a new way.
We love the piece but orange and pink always make it jump out of a composition. Recently, we spliced in the green straps to cool the other colors’ jets. We also cut and rearranged its parts to make it long and narrow.
LandesSullivan at gmail.com